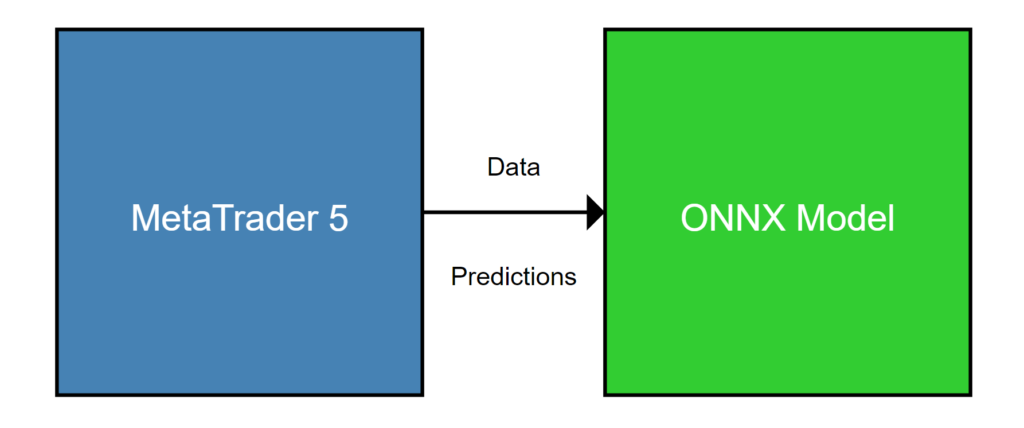
EA開発者の一部で、機械学習モデルの活用が注目を集めています。本記事では、ONNXモデルをMQL5言語で実装し、MT5で運用する方法を詳しく解説します。
Pythonでのモデル構築から、MQL5でのONNXモデルの読み込み、EA(エキスパートアドバイザー)への組み込みまで、解説しています。
- ONNXモデルの基礎と利点
- PythonでのCNN-LSTMモデル構築
- MQL5でのONNXモデル実装テクニック
- MT5でのバックテストと最適化
初心者から上級者まで、機械学習を活用した取引戦略の開発に興味がある方必見の内容です。
先にこちらの記事をお勧めします

機械学習EAの基本中の基本がこれ!
これが基本です!
(大事なことは二回言う)
1. モデルの構築
機械学習モデルの構築は、全体のプロセスにおいて非常に重要な部分です。ここでは、Pythonを使用してCNN-LSTMモデルを構築し、ONNXフォーマットにエクスポートする方法を説明します。
1.1 Pythonとライブラリをインストールする
まず、必要なPythonライブラリをインストールします。TensorFlow、pandas、scikit-learn、matplotlib、tqdm、MetaTrader5、onnx、tf2onnxなどが必要です。これらのライブラリは、データの処理、モデルの構築、トレーニング、そしてONNXフォーマットへの変換に使用されます。
1.2 TensorFlowのバージョンとGPUを確認する
TensorFlowのバージョンとGPUサポートの有無を確認することは重要です。GPUを使用することで、モデルのトレーニング速度が大幅に向上します。この記事では、TensorFlow 2.10.0とCUDA 11.2、cuDNN 8.1.0.7を使用しています。
import tensorflow as tf

print(tf.__version__)
print(len(tf.config.list_physical_devices('GPU'))>0)
バージョンがたくさんあってどれが使えるかがその時によって違うから要確認!
AI研究所ではインストール方法を詳しく解説してるよ!
1.3 モデルの構築と訓練

モデルの構築と訓練は以下の手順で行います:
- MetaTrader 5からのデータ取得:EURUSD通貨ペアの1時間足データを取得します。
- データの前処理:取得したデータを正規化し、訓練用とテスト用に分割します。
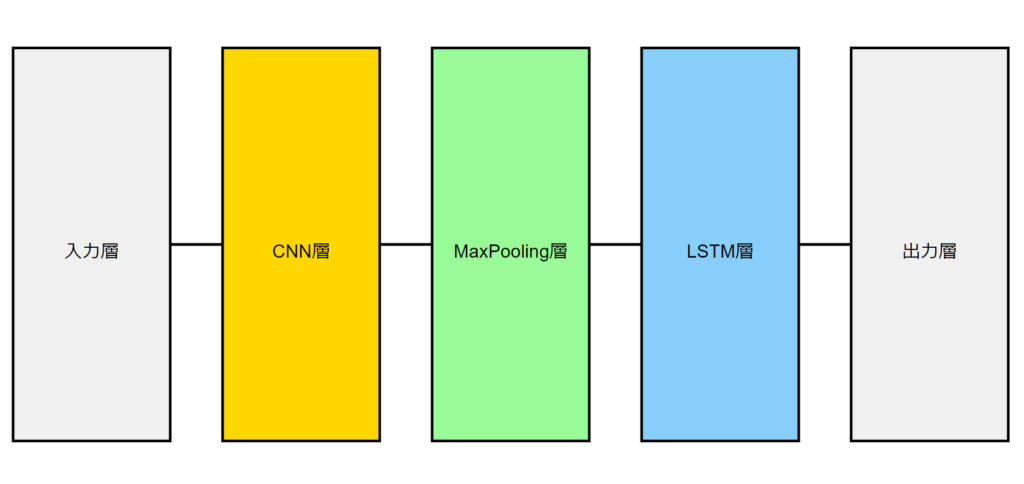
- CNN-LSTMモデルの定義:畳み込み層、LSTM層、ドロップアウト層、全結合層を組み合わせてモデルを構築します。
- モデルのトレーニング:準備したデータを使用してモデルをトレーニングします。
- モデルの評価:トレーニングデータとテストデータでモデルのパフォーマンスを評価します。
- ONNXへの変換:トレーニング済みモデルをONNXフォーマットに変換します。
import numpy as np
import pandas as pd
from sklearn.preprocessing import MinMaxScaler
from keras.models import Sequential
from keras.layers import Dense, LSTM, Conv1D, MaxPooling1D, Dropout

# データの準備(仮のデータを使用)
df = pd.DataFrame(np.random.randn(1000, 1), columns=['close'])
data = df.values
scaler = MinMaxScaler(feature_range=(0, 1))
scaled_data = scaler.fit_transform(data)

# データの分割
train_size = int(len(scaled_data) * 0.8)
train_data = scaled_data[:train_size]
test_data = scaled_data[train_size:]

# モデルの構築
model = Sequential([
    Conv1D(filters=64, kernel_size=2, activation='relu', input_shape=(120, 1)),
    MaxPooling1D(pool_size=2),
    LSTM(50, return_sequences=True),
    Dropout(0.2),
    LSTM(50),
    Dropout(0.2),
    Dense(1)
])

model.compile(optimizer='adam', loss='mean_squared_error')

# モデルの訓練
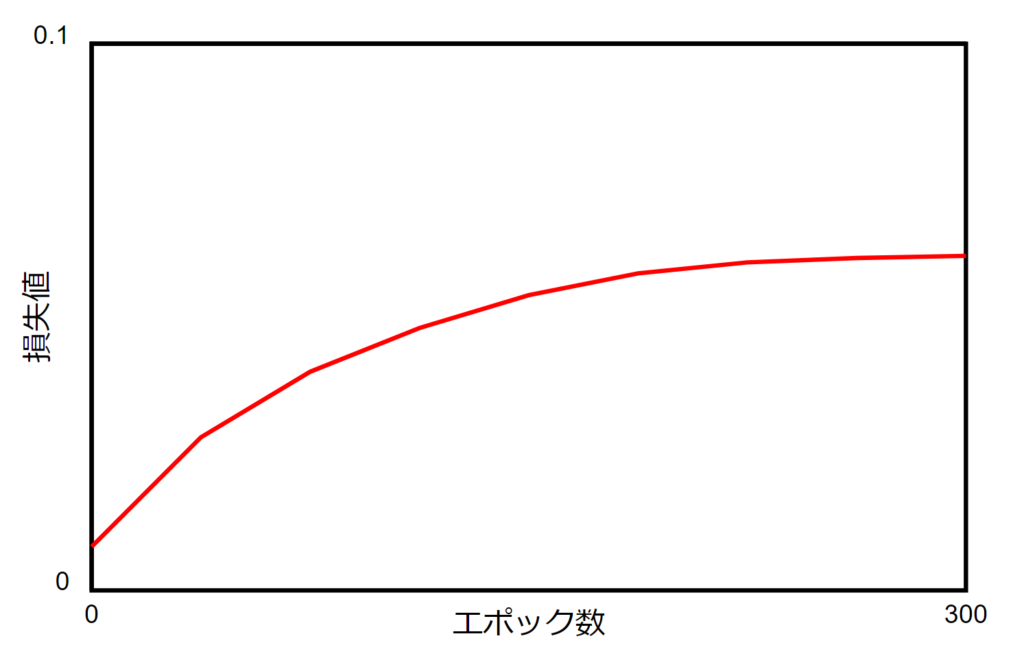
model.fit(train_data[:-1], train_data[1:], epochs=50, batch_size=32, validation_split=0.1)

# ONNXへの変換
import tf2onnx
onnx_model, _ = tf2onnx.convert.from_keras(model)
with open("forex_model.onnx", "wb") as f:
    f.write(onnx_model.SerializeToString())
このプロセスにより、MetaTrader 5で使用可能なONNXモデルが生成されます。


CNN-LSTMは為替チャート分析の基本となる学習モデル
MQL5本家の記事でも最高の精度と評価してるくらい
2. MetaTrader 5でモデルを使用する

ONNXモデルをMetaTrader 5で使用するには、MQL5言語でいくつかの関数を利用する必要があります。
2.1 始める前に知っておくとよいこと
ONNXモデルをMQL5で使用する際には、以下の点に注意が必要です:
- モデルの作成方法:OnnxCreateまたはOnnxCreateFromBufferを使用します。
- 入出力テンソルのサイズ設定:OnnxSetInputShapeとOnnxSetOutputShape関数を使用します。
- データ型の一致:入力データと出力データの型をモデルに合わせます。
- モデルの実行:OnnxRun関数を使用します。
- リソースの解放:使用後はOnnxRelease関数でモデルを解放します。
2.2 onnxファイルを読み取り、入力と出力に関する情報を取得する

ONNXファイルから必要な情報を取得するために、MQL5スクリプトを使用します。このスクリプトは、モデルの入力と出力のデータ型や形状を確認します。これにより、モデルを正しく使用するための準備が整います。
//+------------------------------------------------------------------+
//|                                                OnnxModelInfo.mq5 |
//|                                  Copyright 2023, MetaQuotes Ltd. |
//|                                             https://www.mql5.com |
//+------------------------------------------------------------------+
#property copyright "Copyright 2023, MetaQuotes Ltd."
#property link      "https://www.mql5.com"
#property version   "1.00"

#define UNDEFINED_REPLACE 1

//+------------------------------------------------------------------+
//| Script program start function                                    |
//+------------------------------------------------------------------+
void OnStart()
  {
   string file_names[];
   if(FileSelectDialog("Open ONNX model",NULL,"ONNX files (*.onnx)|*.onnx|All files (*.*)|*.*",FSD_FILE_MUST_EXIST,file_names,NULL)<1)
      return;

   PrintFormat("Create model from %s with debug logs",file_names[0]);

   long session_handle=OnnxCreate(file_names[0],ONNX_DEBUG_LOGS);
   if(session_handle==INVALID_HANDLE)
     {
      Print("OnnxCreate error ",GetLastError());
      return;
     }

   OnnxTypeInfo type_info;

   long input_count=OnnxGetInputCount(session_handle);
   Print("model has ",input_count," input(s)");
   for(long i=0; i<input_count; i++)
     {
      string input_name=OnnxGetInputName(session_handle,i);
      Print(i," input name is ",input_name);
      if(OnnxGetInputTypeInfo(session_handle,i,type_info))
         PrintTypeInfo(i,"input",type_info);
     }

   long output_count=OnnxGetOutputCount(session_handle);
   Print("model has ",output_count," output(s)");
   for(long i=0; i<output_count; i++)
     {
      string output_name=OnnxGetOutputName(session_handle,i);
      Print(i," output name is ",output_name);
      if(OnnxGetOutputTypeInfo(session_handle,i,type_info))
         PrintTypeInfo(i,"output",type_info);
     }

   OnnxRelease(session_handle);
  }
//+------------------------------------------------------------------+
//| PrintTypeInfo                                                    |
//+------------------------------------------------------------------+
void PrintTypeInfo(const long num,const string layer,const OnnxTypeInfo& type_info)
  {
   Print("   type ",EnumToString(type_info.type));
   Print("   data type ",EnumToString(type_info.element_type));

   if(type_info.dimensions.Size()>0)
     {
      bool   dim_defined=(type_info.dimensions[0]>0);
      string dimensions=IntegerToString(type_info.dimensions[0]);
      for(long n=1; n<type_info.dimensions.Size(); n++)
        {
         if(type_info.dimensions[n]<=0)
            dim_defined=false;
         dimensions+=", ";
         dimensions+=IntegerToString(type_info.dimensions[n]);
        }
      Print("   shape [",dimensions,"]");
      //--- not all dimensions defined
      if(!dim_defined)
         PrintFormat("   %I64d %s shape must be defined explicitly before model inference",num,layer);
      //--- reduce shape
      uint reduced=0;
      long dims[];
      for(long n=0; n<type_info.dimensions.Size(); n++)
        {
         long dimension=type_info.dimensions[n];
         //--- replace undefined dimension
         if(dimension<=0)
            dimension=UNDEFINED_REPLACE;
         //--- 1 can be reduced
         if(dimension>1)
           {
            ArrayResize(dims,reduced+1);
            dims[reduced++]=dimension;
           }
        }
      //--- all dimensions assumed 1
      if(reduced==0)
        {
         ArrayResize(dims,1);
         dims[reduced++]=1;
        }
      //--- shape was reduced
      if(reduced<type_info.dimensions.Size())
        {
         dimensions=IntegerToString(dims[0]);
         for(long n=1; n<dims.Size(); n++)
           {
            dimensions+=", ";
            dimensions+=IntegerToString(dims[n]);
           }
         string sentence="";
         if(!dim_defined)
            sentence=" if undefined dimension set to "+(string)UNDEFINED_REPLACE;
         PrintFormat("   shape of %s data can be reduced to [%s]%s",layer,dimensions,sentence);
        }
     }
   else
      PrintFormat("no dimensions defined for %I64d %s",num,layer);
  }
//+------------------------------------------------------------------+
これコンパイルできないのはWANのせいじゃないです
本家の参照なので・・・
2.3 取引EAでのONNXモデルの使用例
実際の取引EAでONNXモデルを使用する例を示します。このEAは以下の機能を持ちます:
- ONNXモデルのロードと初期化
- 市場データの取得と前処理
- モデルを使用した価格予測
- 予測に基づく取引シグナルの生成
- ポジションの開閉
#include <Trade\Trade.mqh>

input double InpLots = 1.0;    // Lots amount to open position

#resource "Python/model.120.H1.onnx" as uchar ExtModel[]

#define SAMPLE_SIZE 120

long     ExtHandle=INVALID_HANDLE;
int      ExtPredictedClass=-1;
datetime ExtNextBar=0;
datetime ExtNextDay=0;
float    ExtMin=0.0;
float    ExtMax=0.0;
CTrade   ExtTrade;

//--- price movement prediction
#define PRICE_UP   0
#define PRICE_SAME 1
#define PRICE_DOWN 2
//+------------------------------------------------------------------+
//| Expert initialization function                                   |
//+------------------------------------------------------------------+
int OnInit()
  {
   if(_Symbol!="EURUSD" || _Period!=PERIOD_H1)
     {
      Print("model must work with EURUSD,H1");
      return(INIT_FAILED);
     }

//--- create a model from static buffer
   ExtHandle=OnnxCreateFromBuffer(ExtModel,ONNX_DEFAULT);
   if(ExtHandle==INVALID_HANDLE)
     {
      Print("OnnxCreateFromBuffer error ",GetLastError());
      return(INIT_FAILED);
     }

//--- since not all sizes defined in the input tensor we must set them explicitly
//--- first index - batch size, second index - series size, third index - number of series (only Close)
   const long input_shape[] = {1,SAMPLE_SIZE,1};
   if(!OnnxSetInputShape(ExtHandle,ONNX_DEFAULT,input_shape))
     {
      Print("OnnxSetInputShape error ",GetLastError());
      return(INIT_FAILED);
     }

//--- since not all sizes defined in the output tensor we must set them explicitly
//--- first index - batch size, must match the batch size of the input tensor
//--- second index - number of predicted prices (we only predict Close)
   const long output_shape[] = {1,1};
   if(!OnnxSetOutputShape(ExtHandle,0,output_shape))
     {
      Print("OnnxSetOutputShape error ",GetLastError());
      return(INIT_FAILED);
     }
//---
   return(INIT_SUCCEEDED);
  }
//+------------------------------------------------------------------+
//| Expert tick function                                             |
//+------------------------------------------------------------------+
void OnTick()
  {
//--- check new day
   if(TimeCurrent()>=ExtNextDay)
     {
      GetMinMax();
      //--- set next day time
      ExtNextDay=TimeCurrent();
      ExtNextDay-=ExtNextDay%PeriodSeconds(PERIOD_D1);
      ExtNextDay+=PeriodSeconds(PERIOD_D1);
     }

//--- check new bar
   if(TimeCurrent()<ExtNextBar)
      return;
//--- set next bar time
   ExtNextBar=TimeCurrent();
   ExtNextBar-=ExtNextBar%PeriodSeconds();
   ExtNextBar+=PeriodSeconds();
//--- check min and max
   double close=iClose(_Symbol,_Period,0);
   if(ExtMin>close)
      ExtMin=close;
   if(ExtMax<close)
      ExtMax=close;

//--- predict next price
   PredictPrice();
//--- check trading according to prediction
   if(ExtPredictedClass>=0)
      if(PositionSelect(_Symbol))
         CheckForClose();
      else
         CheckForOpen();
  }
//+------------------------------------------------------------------+
//| Get minimal and maximal Close for last 120 days                  |
//+------------------------------------------------------------------+
void GetMinMax(void)
  {
   vectorf close;
   close.CopyRates(_Symbol,PERIOD_D1,COPY_RATES_CLOSE,0,SAMPLE_SIZE);
   ExtMin=close.Min();
   ExtMax=close.Max();
  }
//+------------------------------------------------------------------+
//| Predict next price                                               |
//+------------------------------------------------------------------+
void PredictPrice(void)
  {
   static vectorf output_data(1);            // vector to get result
   static vectorf x_norm(SAMPLE_SIZE);       // vector for prices normalize

//--- check for normalization possibility
   if(ExtMin>=ExtMax)
     {
      ExtPredictedClass=-1;
      return;
     }
//--- request last bars
   if(!x_norm.CopyRates(_Symbol,_Period,COPY_RATES_CLOSE,1,SAMPLE_SIZE))
     {
      ExtPredictedClass=-1;
      return;
     }
   float last_close=x_norm[SAMPLE_SIZE-1];
//--- normalize prices
   x_norm-=ExtMin;
   x_norm/=(ExtMax-ExtMin);
//--- run the inference
   if(!OnnxRun(ExtHandle,ONNX_NO_CONVERSION,x_norm,output_data))
     {
      ExtPredictedClass=-1;
      return;
     }
//--- denormalize the price from the output value
   float predicted=output_data[0]*(ExtMax-ExtMin)+ExtMin;
//--- classify predicted price movement
   float delta=last_close-predicted;
   if(fabs(delta)<=0.00001)
      ExtPredictedClass=PRICE_SAME;
   else
     {
      if(delta<0)
         ExtPredictedClass=PRICE_UP;
      else
         ExtPredictedClass=PRICE_DOWN;
     }
  }
//+------------------------------------------------------------------+
//| Check for open position conditions                               |
//+------------------------------------------------------------------+
void CheckForOpen(void)
  {
   ENUM_ORDER_TYPE signal=WRONG_VALUE;
//--- check signals
   if(ExtPredictedClass==PRICE_DOWN)
      signal=ORDER_TYPE_SELL;    // sell condition
   else
     {
      if(ExtPredictedClass==PRICE_UP)
         signal=ORDER_TYPE_BUY;  // buy condition
     }

//--- open position if possible according to signal
   if(signal!=WRONG_VALUE && TerminalInfoInteger(TERMINAL_TRADE_ALLOWED))
     {
      double price;
      double bid=SymbolInfoDouble(_Symbol,SYMBOL_BID);
      double ask=SymbolInfoDouble(_Symbol,SYMBOL_ASK);
      if(signal==ORDER_TYPE_SELL)
         price=bid;
      else
         price=ask;
      ExtTrade.PositionOpen(_Symbol,signal,InpLots,price,0.0,0.0);
     }
  }
//+------------------------------------------------------------------+
//| Check for close position conditions                              |
//+------------------------------------------------------------------+
void CheckForClose(void)
  {
   bool bsignal=false;
//--- position already selected before
   long type=PositionGetInteger(POSITION_TYPE);
//--- check signals
   if(type==POSITION_TYPE_BUY && ExtPredictedClass==PRICE_DOWN)
      bsignal=true;
   if(type==POSITION_TYPE_SELL && ExtPredictedClass==PRICE_UP)
      bsignal=true;

//--- close position if possible
   if(bsignal && TerminalInfoInteger(TERMINAL_TRADE_ALLOWED))
     {
      ExtTrade.PositionClose(_Symbol,3);
      //--- open opposite
      CheckForOpen();
     }
  }
EAの主要な部分は以下の通りです:
- OnInit関数:モデルの初期化とパラメータの設定を行います。
- OnTick関数:新しい価格データが来るたびに呼び出され、予測と取引判断を行います。
- PredictPrice関数:ONNXモデルを使用して次の価格を予測します。
- CheckForOpen関数:新規ポジションを開くかどうかを判断します。
- CheckForClose関数:既存のポジションを閉じるかどうかを判断します。
これらの関数を組み合わせることで、ONNXモデルを使用した自動取引システムが実現します。

必要なコードばかりです。
理解できるようにしましょう!
もちろん実際に運用するにはさらなる工夫が必要だと思います
3. ONNXモデルベースのEAのテスト
構築したEAの性能を評価するために、MetaTrader 5のストラテジーテスターを使用します。テストは以下の手順で行います:
- テストパラメータの設定:通貨ペア、期間、初期資金などを設定します。
- バックテストの実行:過去のデータを使用してEAの性能をシミュレートします。
- 結果の分析:利益、損失、勝率、ドローダウンなどの指標を確認します。
- パラメータの最適化:必要に応じてEAのパラメータを調整し、再テストを行います。
テスト結果に基づいて、EAの改善点を見つけ、さらなる最適化を行うことができます。
まとめ
MQL5でONNXモデルを使用することで、高度な機械学習アルゴリズムを取引戦略に組み込むことが可能になります。
ただし、機械学習モデルを実際の取引に使用する際には、以下の点に注意が必要です:
- オーバーフィッティングの回避:過去のデータに過度に適合したモデルは、将来の市場で良好なパフォーマンスを発揮できない可能性があります。
- リスク管理:モデルの予測に過度に依存せず、適切なリスク管理策を講じることが重要です。
- 継続的な監視と調整:市場環境の変化に応じて、モデルの再トレーニングや調整が必要になる場合があります。
- 法的・倫理的考慮:自動取引システムの使用に関する規制や倫理的ガイドラインを遵守することが重要です。
MQL5とONNXモデルを組み合わせることで、高度な取引戦略を実装する方法を一つ取り入れることができるようになります。
オンラインコミュニティ
こちらのコミュニティで、AIや機械学習をトレードに活かすために日々探求しています。
興味のある方は覗いてみてください。
参考記事
記事本文のコードは下記の記事の内容を引用しています。


